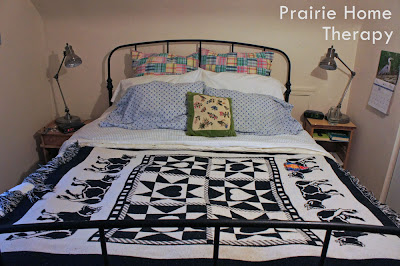
This one certainly qualifies as an Anti-Procrastination Project.
I have put this one off for more than five years. I know it's been at least five years, because we got our new Beagle puppy about three days before my nephew was born on Christmas Eve. My nephew turned five last Christmas Eve.
The puppy did what puppies do: he chewed through everything.
Back sometime in the late eighties, or early nineties, I got this blanket on a trip to New Orleans with a boyfriend I had just broken up with. (Have you ever done that? Go on a vacation you've planned and paid for with someone you broke up with?) I think he may have thought it was a trial separation. I knew I would never sleep with him under that blanket, so I bought it. Plus, it was in a restaurant, and I'd never been in a restaurant that sold home décor before (or since).
Plus, it was cool.
The blanket is woven and has a design on both sides, each the reverse of the other. A classmate in my Organizing Fundamentals course alerted me to the fact that this meant it would be best if I mended the blanket from both sides.
The procedure to fix it was essentially this.
Buy a new iron. Buy a new iron and ironing board holder. Buy another iron. Oh wait, that was this anti-procrastination project! Just goes to show, everything is related.
Sorry, back to mending the hole.
1. Trim loose threads and tidy up the hole.
2. Take a lint roller and remove as much dog hair and other debris as possible which has accumulated for five years around the hole.
3. Stitch around the hole on the sewing machine to prevent further unravelling.
4. Get some really outrageous fabric to cover the "patch." Choose a shape which is sympathetic to the blanket.
5. Cut out two.
6. Hem the raw edges of the patches.
(NB: I should have used a zig zag stitch here and not a straight stitch.)
I was so nervous about ironing on the iron-on material that I procrastinated these next steps for a full week.
7. Find some sort of flexible woven stuff to iron on. Cut out two patches slightly smaller than the fabric patches.
I trimmed this to get this:
8. Iron it onto the blanket. At the last minute I thought to put down a piece of paper underneath the hole. I didn't want the iron-on material to stick to the ironing board cover!
I'm glad I did, because it did stick to the paper--but lightly. It was easy to peel off.
9. Then, carefully stitch the patch to the patch. (Again, use a zig zag. Embrace the zig zagginess. Much better than curling edges which is what actually happened after I washed it.)
Repeat steps 8 and 9 for the other side.
Wash the blanket--for the first time in five years--and display proudly.
I am so glad that's done.
(Except for the zig zag. I have to go back and re-do that.)


1 comment :
What I like about this is that you did not even try to hide the patch. I think that is what I would have done. I'm not as bold as you :D
Post a Comment