Showing posts with label boom dada boom. Show all posts

Friday, October 3, 2014

The Kitchen Project: The Table


This table has a history.

When I bought this table three and a half years ago, I expected it to solve all my "eating in the kitchen woes." Little did I know, a whole new set of woes were about to begin.

It started innocently enough.

One day, while cleaning up after dinner, I threw my dishcloth on a spot to "soak" it and make it easy to wipe up. Little did I know that I was inviting disaster.

The Liatorp, by IKEA, is one of the few pieces they carry which is simply a melamine finish on a pressboard (or mdf) surface. (The new Ingatorp is, unfortunately, no different.)

Once the finish cracks or becomes pitted, the fibres in the pressboard underneath swell up, creating huge blots.
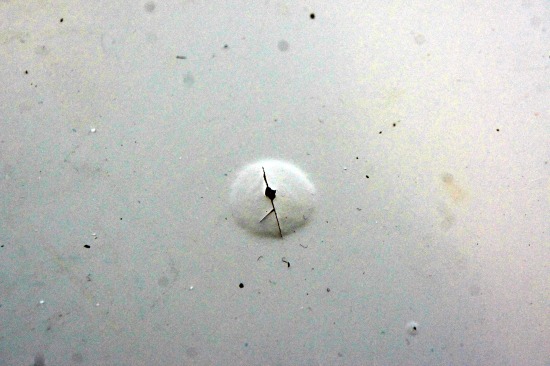

This becomes this in short order.


Most of their furniture is at least some sort of wood. The pressboard, however, made the table impossible to re-finish--or so I thought.

So, for too long, I lived with this.


Eventually, it got so nasty (and clean up so impossible) we just stopped eating at it. That killed me. I believe very strongly in having family meals together. I have teenagers. It is really important for us to connect. I imposed a rule: dinner together once a week. That's how bad it was.

Once in a while, I'd research how to "fix" it, but I never found anything quite satisfactory.

Then, one day last week, I was thinking about it and realised it was simple. I would sand down the raised bits, prime them, and then re-paint with a melamine paint.


So, that's what I did.


I used a shellac based primer. An oil based primer might have done the job just as well, but I thought of the pressboard as if they were knots. They had to be super sealed to protect them from moisture.


Then, I rolled on a couple of coats of the melamine paint (colour matched to a side rail I took into Home Depot.) I used a sponge roller which was a bit of a mistake. It knocked back the sheen of the paint and it gave me really thin coverage. The thin coverage wasn't a bad thing, necessarily, I just wanted the process to go a bit more quickly, so I switched to a brush. I did two coats with it.

It is not perfect.

If you look closely, you can see the brush strokes.You can also see where the pressboard spots were. (Trust me. The camera can't pick it up but the naked eye can. Especially when you get down close when the sun is shining.) I probably should have sanded a bit more. I'm not sure wood filler would have helped but it might have.


The sheen doesn't match the original table top. As you can see, you can tell when you put the leaf in.


The thing is, I really don't care about these imperfections that much. They certainly are not going to keep our family from the table anymore.

(Next up: repainting those chairs. But don't hold your breath.)


Sunday, September 28, 2014

Accountability Post: Maintaining Momentum

I promised myself I could have a "day off" this schedule on days I worked more than six hours. That was Monday and Friday. 


All told, it was a pretty good week.

I didn't exercise as much as I wanted too (only once this week). I'll have to make that more of a priority next week.

I didn't do it alone, either. I enlisted help.

sorry about the blur, I was laughing at my son's reticence to admit to the world he does dishes.


I put the duvet back on the bed for winter and played around with the pillows for fun colour combinations.


It didn't take long to pick things up and put them away, but I had to be diligent. I won't lie: it took some effort. Reminding myself that I committed to taking as much as half an hour in the morning helped. A half hour on housework feels just doable. (And I likely didn't even spend that long on actual housework.)

I worked on a few projects this week. I did our taxes (finally!) and submitted them to a friend for filing. I ran some things I'd decluttered to Value Village (a charity shop). And, boom da da boom, after a false start on Sunday (where thirty degrees plus wind made putting on that final coat an impossibility. I had to sand it off and start over later in the week) I finished painting the kitchen cabinet doors! I asked my husband to reattach them for me.


 I like it! I was so afraid I wouldn't, but as I'd hoped, painting the small lower cabinets a nice dark colour (Dragonfly by Benjamin Moore in Advance High Gloss) helps them balance against those massive uppers. (Ugh. That yellow has to go.)

I take it back. It wasn't a good week--it was a great week. I took a few hours, again, on Saturday morning and vacuumed, cleaned the bathrooms, and mopped the floors. So, we have a clean slate for the upcoming week. It is going to be a busy one with the launch of the One Room Challenge. (October 2nd). I am so excited.

Friday, April 26, 2013

The Pile in the Hall

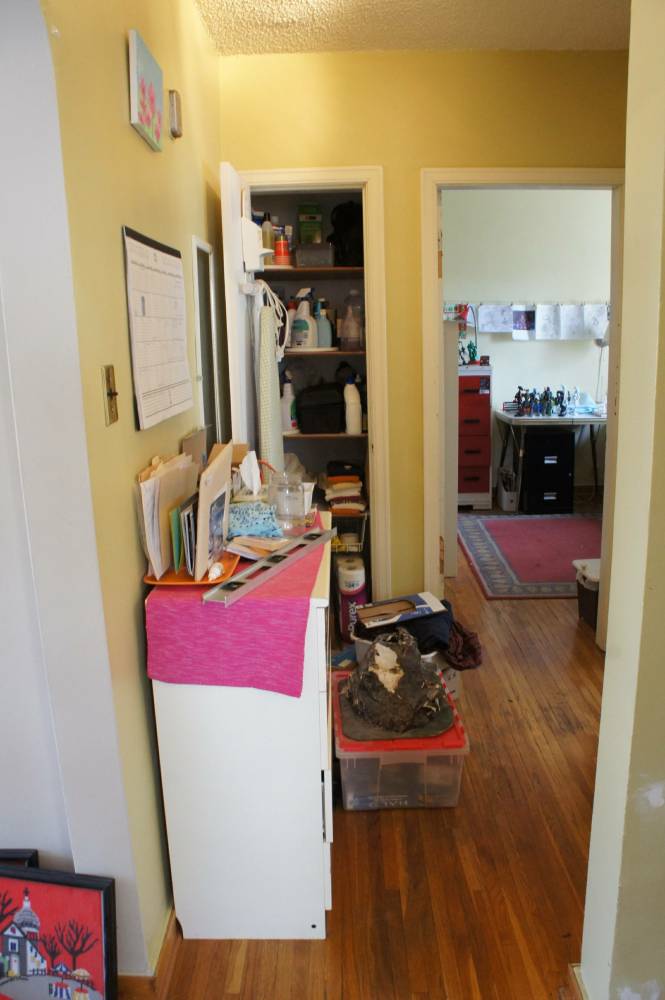
When I cleaned my son's room last weekend, I very carefully did not show you the pile I'd made.


Right here, right outside his doorway.


It sat there Monday.

It sat there Tuesday.

It sat there Wednesday.

Finally, on Thursday, (yesterday) I got tired of walking around it. I wanted to close the closet door, too.

That's me standing in the doorway to the bathroom. Hi!

So, I got rid of it.

The disgustingly dusty Lincoln Logs with soldiers in the dustpan got upended into the kitchen sink and everything was washed. There's no "before." It was that bad.


After playing with them for a few minutes after school, my daughter helped me bag them up for donation.


I had to wait until my son got home for permission to put things like the boxes his Bionicles came in into the garbage and the recycling bag. He was OK with it. After that, I made short work of what was left: the volcano was dusted, wrapped and placed in the games room, the clothing was put into the laundry hamper, and the storage container repurposed.

Ta Da!

Sorry. Not exactly stellar photos. Hard to do in the evening.

Much better.

my poor floors!


This was hard for me. I'm not sure what's going on in my head, either.

It doesn't sound reasonable once I say it out loud, but all day I was in that anxious state I get when I think "I got nothing done, today."

I'm supposed to be working in the basement, on the shelves. That's the focus. And while I did work there and do a few things, all day long I really felt like I got nothing done. This project wasn't on a to do list. It wasn't an anticipated part of the project "cleaning my son's room." It wasn't a decluttering project, or an organizing project. It was just stuff in the hallway. It was just left overs. And because of that, I resist doing these sorts of things. (There's a similiar situation currently in my dining room.)

That's why I took pictures and wrote this blog post--so I have proof I really did do something today and it counts.


(There's a reason the word "therapy" is a part of my blog's name!)

Anyway, it was a pile--and I cleared it. That qualifies me for a link up to Project Simplify. Yay!

Project Simplify on Simple Mom

Friday, March 2, 2012

Ta Da: The Bathroom, Better.

OK. So, you know it isn't "done," right?

In spite of the fact that we ripped out the old, yellowed plastic tub and tile surround on November 20th and finished grouting our new tile sometime during the last week of January, 12 weeks later, and it is now the beginning of March, we're still not finished in the bathroom. Such is the DIY life with us.

I still need to paint the walls and sew a proper curtain and possibly a shower curtain. (I've had the IKEA Toftbo since 2007!)

We also need to install a new, more powerful fan to help us with the moisture issues in here and I'm still scrubbing tape residue from the sides of the tub here we taped to protect it.

But enough. It's white! bright! and shiny! and ever so much better.

Here's a tour of our imperfect-but-that's life bathroom.

From the door:

Before (July 2010)


Today:


Fortunately, this shelving is all gone:


And now:


Thanks for your suggestions: I have been looking for some bathroom art to go in the spot beteen the cabinet and the toilet.

My daughter has been setting her alarm to get up 15 minutes earlier in the morning so she can shower. She never used to shower. She told me the other day that the old shower "creeped her out."

I know exactly what she meant.

I am upset that I don't have pictures of the old creepy tub and shower surround to show you. I did take a set of pictures expressly for this post: I knew I would only have the courage to show you the true horror if I could also wipe your brains clear of the image with the "After." I've been spared that humiliation, however, as the pictures were lost in the Computer Crash. I suppose I should be grateful.

Instead, though. I can give you a small glimpse from pictures I've posted before. Here is the back wall by the window:

Before:


And now:


The plumbing wall, then:


Now:


Remember the hole in the wall?


That's all fixed with new baseboard and quarter round and everything! (well, except paint. That's just primer.)


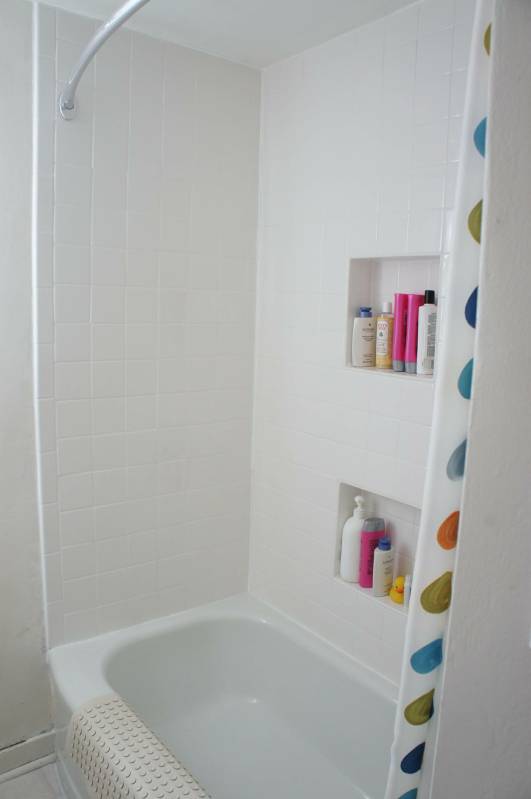
And the best part: the back wall.
(This really was the worst. There is no before.)


We love our niches!

Lessons learned:

1) Research, research, research. We walked into this quite thinking we would figure it out as we went. We did--but it took a whole lot longer than it would have, otherwise. We didn't know what we'd find when we took the plastic off: we didn't know we'd have to re-build the walls. We should have researched our options "just in case."

2) Don't make decisions at Home Depot.
OK. We didn't, quite. But we found out about the Kerdie and jumped without investigating other options. By the time we finished, we'd found out about something called Weediboard which I think we would have preferred.

3) Take all the walls down to the studs. We really should have done this. We thought we'd keep materials out of the landfill. We didn't think we kanted the work. Using the Kerdie/Schluter seemed like a great way to keep our existing walls and sort of patch the old and new together. And so it was. But in the end, it was also more work than starting again from scratch--and if we had torn down all the walls, we could have insulated the exterior wall better. And more and better insulation is never a bad thing!

And so, there we have it.

It may leave a bit to be desired from a decorating stand point, but taking a shower in here (and, so I'm told, a bath) is wonderful.

Wednesday, September 21, 2011

The Donation Station/Folding Table Makeover

This is one of those things where making a couple of small changes creates a Big Impact.

I love projects like this!

In my basement laundry room, I'm lucky enough to have room for a folding table.

I made it by placing a piece of (good) plywood on top of an old 2x4 frame we got out of my mother's garage years ago. (I've had that piece of plywood since I was eighteen. I used it as a desk top.)

To the left of the table goes laundry straight out of the dryer: to the right goes the folded laundry right into a basket to be taken upstairs.

Here is what it looked like for ...well, ever.


Underneath the table top I placed a few sturdy boxes. Beneath them is a plastic under-the-bed- box. I couldn't use it upstairs because the plastic would have scratched up our wood floors terribly. And since the frame doesn't have a bottom shelf, this serves the purpose. Plus, it's waterproof! (But can you believe it sat empty for ten years?) This was the best place to put out grown clothing when the kids were younger. Out of the wash and into the boxes they would go! Now, it's a great catch-all for everything leaving the house.

The makeover was too simple. I painted the frame and covered the plywood top with a plastic tablecloth I picked up at the dollar store. I stapled it down.

I replaced the hodge podge of boxes underneath with two white laundry baskets I already had on hand.

And, I filled that under-the-bed box with my husbands hunting clothing--that freed up an astonishing amount of space in another container for other things. I placed white "newsprint" paper on top of the clothing to camouflage the Camouflage.

With the baskets on top of it (instead of boxes) the container is much more accessible!


And another view: (if you were standing and talking to me from the other side of the table while I folded, this is what you would see. Well, hopefully you'd see me, too. After all, that's who folded all that laundry yesterday!)

I have no idea why I took a picture of it covered in laundry. Maybe I was trying to demonstrate how it works? I don't know. Think of it as an action shot.

Boom da da boom.

Not sure this really qualifies as a "Wow" but I'm linking to Wow Us Wednesdays at Savvy Southern Style.

Check out all the other, more credible, "wows".

Sunday, March 13, 2011

Powder Room Reveal

Ta Da!


This is our upstairs bathroom. It's not a full bath: that's downstairs. I finally decided to get to it and get it done so I could include it in the home tour series.

This has been a long time coming.

I lived with this bathroom, in this state, for years:


Then, in August, two things came together--and change became possible:

1) I found out about spray paint.
I'd always known about spray paint, of course, but I'd always thought it was for outdoor things, and I thought it only came in bright primary and neon colours. My eyes were forever opened when I came across a CSI project using spray paint.

2) A CSI project itself. It was called "create something inspired by pottery barn" or something to that effect.

That's all it took. Suddenly, I knew change was possible, and I had a direction.

I made a mood board from images in the Pottery Barn bath catalog.


The back of the toilet is metal. We sanded it.

We eventually sanded off the rust, too.

It took several coats of spray paint: but it worked!

Things came together quite quickly. I chose the paint colour based on the collaboration between Pottery Barn and Benjamin Moore. That story here

I sewed a PB inspired curtain for my tiny casement window. Tutorial here


Individual pieces were transformed with spray paint. Lots of detailed before and after shots here

And then things stalled. I wanted to put the shelves back up over the toilet: yet I loved the openess without them. Plus, I wanted new boards.

I finally got them up. I don't love them. But, the room is now fully functional--which is a good thing.

So, here we are, at long last:

Looking in through the door from the hall way.

Spray painted toilet tank top, bought new seat, made and installed new shelves, sewed new curtains, painted the walls, bought a rug.


The east wall, to the left of the toilet.

Purchased new towels, bought and installed new toilet roll holder, spray painted basket, bought new washcloths, made new art work and purchased a new frame which I painted and distressed.

To the right of the toilet: the sink area.

Spray painted old Ikea metal spice shelves, added hooks, replaced wood shelf with glass, replaced old cracked mirror with new, installed new light switch and plate.

I also spray painted the ceiling light fixture. (not shown)

And there we have it.

Linking to the 112th Met Monday.


and to Wow Us Wednesdays #6 at Savvy Southern Living.
Photobucket

Thanks for coming to see my "new" bathroom.

Monday, January 17, 2011

Nagging Tasks

I admit it.

I'm falling behind on keeping my January resolutions.

This may have something to do with my lethargy:


(Snow, everyday. Minus 20C or so, every day. I caught this shot yesterday from the driveway as my son was coming out to shovel, poor kid. I had to give him my hat.)

One of my resolutions, a la Happiness Project, is to do one of those "nagging tasks" every day. You know--that thing you keep thinking you really must do--but then forget about until you trip over the supplies or are inconvenienced by its not-being-done-yet, once again.

One such nagging task was to clear off this mantle, scrape up all the wax, put away the lingering Christmas schtuff, give it a good clean. You know the drill.


And so, before heading out yesterday, I did it.


It's nuts how motivating it is to post what projects I get done, so please, lets hope there will be one a day this week.

That is if you can abide such nonsense.

Here's the next task:


What's wrong with this picture, you might ask--other than the stuffing falling out of the pillow, the unmade bed, the basket of Christmas things not yet put away and the messy shelves? Remember minus 20? Yeah, well, that. The task is to get actual curtains up on the window of my daughter's room--and hemmed. I do have plastic up on the window. Still. Embarrassing.

Hope you are keeping warm wherever you are, whatever your weather!
Related Posts Plugin for WordPress, Blogger...