Showing posts with label back entry. Show all posts

Sunday, February 7, 2016

Week 4: The Launch Pads (or Entry Ways)


Turns out, I am taking this challenge much more seriously than I thought I would. I have not been able to get over to my Mom's as much as I should--whenever I've been free, she's been sick or otherwise unavailable. So I have a bit of time on my hands to focus on my own place--and I don't want to decorate--so cleaning it is!

The "launch pads" --or entryways-- are such practical spaces. They are the spot for all things coming into and out of the house. I have a small shelf in the front entry hallway for letters and casserole dishes and such. The bucket beneath it is for library books.


Around the corner, in front of the coat closet, I have my communication centre.


Friday, I spent cleaning up the front hallway. I washed all the walls, the door, the trim and the baseboards with a weak solution of T.S. P. (Tri-sodium phosphate.) Then I vacuumed the floor, washed it on my hands and knees near the door and then mopped it. I washed the entry way rug--and ruined it.

It didn't come completely clean and the edges started to unravel. I had had a bad feeling about it. Next time, I'll listen.

I had to fold it to get it to fit in the machine. If it weren't for the chewed up edges, I'd throw it back in. As it is, I now need to buy another one. sigh. 


Saturday was the back entry. It is a terrible place to get pictures of.


So much more work!


I wanted to declutter this pocket hanger--so I googled to find out when the mosquito repellant expired. Turns out, it doesn't. These are from at least a couple of years ago. Last summer was so odd: no mosquitoes, no butterflies and no bees. The only insects we really saw were some wasps at the end of August. (They made a nest in our front eaves.)

So, again, I washed the walls and door and trim. I vacuumed the carpet on the landing. I washed the stairs to the kitchen and the stairs to the basement. I tidied the baskets going down to the basement and washed the boot shelf on the other side. Somehow, it took me all day. (I also cleaned the bathroom and the kitchen, but that's another post!)


The floor underneath the carpet still needs to be painted.


I felt good at the end of it all, though. The area doesn't make me scowl anymore--so that's something.


This coming week: The Living Room.


****************************************************
Want to follow along? I'd love it if you joined me. Have these posts delivered right to your inbox!


**************************************************

Thursday, January 7, 2016

A Project at Mom's: Tool Organization.The Very Beginning


Organizing my Mom's tools is something I've been looking forward to for a long time.

I am quite excited about it even though the task is daunting. Currently, it is beyond frustrating trying to get anything done at her place. We can never find what we need.

She has duplicates of duplicates--three drills, for example. Countless screwdrivers. Oh, and drill bits and driver sets. Wire strippers. But a simple pair of needle nose pliers? Well, I think I saw them here, somewhere. One day last week.

And the tools are all over the place, most, dangerously, in the unheated porch just outside (outside!) the back door.

Want to break in but forgot your hammer? Oh look, here's one right here.  

Sometimes, I am astonished she is still alive.

Anyway, every day I worked on her dressing room, I brought my own tools (except for the drill. I did use one of her drills) because I could not bear to be slowed down by the hunt. But that's obviously inconvenient in its own way--not to mention impractical. So I've been collecting ideas for simple and inexpensive ways to corral her tools and make them accessible.

The first step in any organization project is to gather inspiration. Seriously. You need to have a grasp on what you want your space to look like--and how it will function--before you begin.


I love this to pieces. Everything is out and accessible. Unfortunately, unless a tool is put away immediately, there's no chance you'll ever find the spot for it again! It needs labels or a schematic of some sort nearby.

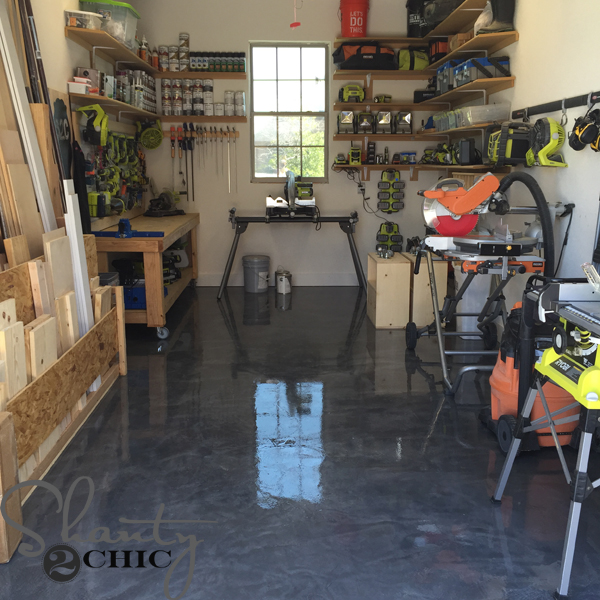
Mom loved this workshop, right down to the shiny floor.


This a different sort of organizational system. Stuff in bins and on shelves may work for some things.

But, I told her we just didn't have room. Not for a lot of shelves--and not for a lot of bins.

This.

The area is not anywhere near this bright. I had to boost the photos substantially so you could even see what's (not) here.


This is where we're going to attempt to store her tools. It's to the right of the bottom of the stairs. (I was standing on the bottom step when I took this.) You have to pass through here to get to the laundry room. (Turn right at the snowflake mat)

It is going to be quite a challenge. As you can see, the space has nothing. That's the concrete wall of her foundation, folks. No studs. No drywall. Mom set up the card table and started gathering what tools she's found around the house. There's that cabinet. The water heater. (helpful?--um, not so much.) There is a set of shelves and filing cabinet to the side.

 I am taking out the cabinet and the card table.

sorry about the blur!

Right beside the stairs are these shelves. Mom cleared off whatever was on these shelves before--and put all of her paint cans here. It's a good spot.

I think what I would like to do is set up some shelves where that cabinet and card table are now (tricky because there all all sorts of pipes and drains and what not in the corner there). And then mount some plywood (or pegboard from the porch?) onto the wall. Of course, then I'd have to frame out the wall.

I have no idea when I am going to be able to do this.

It's not like I can just work on it when I have a spare moment. As it is winter after all, I can't build anything, really. I have tentatively scheduled myself to be over at her place for a full day, once a week.

It is going to be slow. But getting the tools sorted, at least, would make her life--and mine--so much easier.


****************************************************
Want to know how this all turns out? Have these posts delivered right to your inbox!


**************************************************

Tuesday, September 15, 2015

A Retrospective: 2. Passageways: Entry ways, Hallways and The Stairs

This is the second in a series of looking back at the changes I've made to the house since this blog began --over eight years ago.

Passageways are all those spaces we pass through--like hallways and entry ways and the stairs. I like them to be functional--and most especially plesant. They are scattered all over the house, though, so I made up floor plans in order to help orient ourselves.


Wednesday, January 21, 2015

Comings and Goings

today's sunrise. 

Assignment #14.

Create a Landing Strip.

The idea, of course, is to have a place near your exits and entrances for all the stuff that finds its way into your home, no matter who brings it in.

This is a multi-faceted problem. Let's take this systematically.

The Front Door.

Who uses it?

Myself and the kids.

What comes in? (What do you need a place for?)

1) Boots and shoes

2) Coats, Jackets (Personal items like scarves, hats and gloves are stored in the coat pocket and/or sleeve.)

3) Papers my son delivers once a week

4) mail

5) my purse and my daughter's backpack


What goes out?

6) outgoing mail

7) library books to be returned

8) things to be returned to various people

What do we need to store? 

1-8

What have we got?

A narrow hallway right by the front door and around a corner,  a wider hallway with a coat closet. Let's take it in turn.


By the front door we have the carpet for boots, the small wooden child's chair for all sorts of things (currently holding my son's papers. When I am getting ready to leave for work in the morning I put my purse and lunch kit on it. Sometimes, it is a place to put my purse down so I can get my boots off.) The child's chair is in the entrance arch to the living room. Across from it is the doorway to the dining room/home office.


That shelf is mostly decorative, but it does hold outgoing mail at the moment. The bin underneath it holds some library books and a bag of borrowed items to be returned to its owner.


Around the corner is really where the hard work happens.

yes, the two hallways are different colours. That will likely be changed during the Spring One Room Challenge in April.

That dresser (and the calendar above) is command central. School papers which need signing go into my folders--and then get returned to the kids' folders. (Well, that supposed to be how it works. In my son's case, he tends to give them to me right when he comes home from school and immediately retunrs them to his back pack. My daughter wakes me up the morning they are due and frantically waves a pen in my face. We're working on it.) My husband and I also have our own folders. I highly recommend that everyone in a household have a place like this for their own papers.


We collect grocery and gas receipts (separate from our other receipts) so there are envelopes to catch them set up here, too.


One drawer in this dresser is devoted to hats, mitts and scarves, year round. I go through and purge it in the fall. (This way, too, if I do find the odd hat or glove lying around, I have a place to put it without having to find its owner or her coat.)


The coat closet also doubles as a broom closet, so I have all sorts of things here. Most importantly, it is the home for our coats, bags we use to take to the grocery store, bags we re-use, empty backpacks and my purse.


The Back Door.

This is the way to the back yard and the garage.

Who uses it?

Mostly my husband, the dog, sometimes me and the kids.

What comes in?

My husband and his workboots (which he likes to change out of before he goes out to play with the dog), his lunch bag and book bag. Groceries. dirty, filthy dogs paws.

What goes out?

All of the above, plus, in summer, sports stuff.

What do we need to store?

In addition to the above, I need access to gardening supplies, (gloves, a hat, secateurs, and a trowel), a table cloth and roasting forks.

What do we have to work with?

A teeny tiny entry way, and stairs going up to the kitchen and down to the basement.

The shoe pocket organizer holds mostly mosquito repellant and odd bits at the moment. The drawer underneath holds things we won't need until summer.

First, the stairs leading up to the kitchen.


On the left wall, a strip of wood with cup hooks holding keys and the dog's leash. On the right, a towel bar with the long shoe horn and a rag both for the dog's paws and my husband's boots. On the ledge, the spray bottle is to discourage the Beagle's barking. (On the floor to the left is a bucket with cleaning cloths to be taken to the basement laundry room.) Those are my husband's work boots and winter boots/shoes on the stairs.

As you go down the stairs there's boot shelf with a curtain rod above it on the right.


Those sandals are being held up by a bent hanger, the boots by a hanger clip. Sandals and keds live in the pink magazine holders. Beneath the shelf are hooks for bike helmets and a bag holding fishing gear.


Opposite this are the baskets, also suspended from the flooring joists.


They hold hats, summer work gloves, ball mitts and rollar blades and knee pads. They've held all sorts of sports equipment through the years.

(That mess underneath the baskets belongs to the epic basement clean up project which is next month!)

As far as curing goes, I dusted the navy shelf, cleaned off the top of the white dresser, and sorted through the paper work. I decluttered the baskets at the back door, vacummed the magazine/shoe holders and the wire baskets. Then I washed the walls and swept and washed the stairs. I vacuumed the hallway and the coat closet floor, too. Yep. I'm tired.

So, there we have it. I think I've covered how we --and all our stuff-- come and go.

Any questions? I'll answer in the comments.

Thursday, November 21, 2013

Zone 2 CONVERTed: The Cheery Back Entry Way

Not only am I thrilled to have this done: but I am very happy with the way it turned out.


Last spring, during Anti-Procrastination month, I started spiffing up in earnest. I was going to leave it as is, but this summer I was inspired by the book The House that Cleans Itself, by Mindy Starns Clark. I decided to use the approach outlined in the first edition to CONVERT my house into one that, if it doesn't clean itself, is much easier to maintain. The first step was to divide my house into zones. The back entry way was zone 3. You can read about my efforts with the book by clicking on the label HTCI.

What this area needed was a thorough cosmetic lift. Think Nicole Kidman. Essentially, all the rough spots needed to be smoothed out, the holes and cracks patched, and the walls and trim painted. I started in September. I finished the last step on Wednesday, November 21st.

CONVERT, is, of course, a pithy acronym. Here is what it stands for and its relevance to my back entry way.

C- clear out the clutter

There really wasn't a lot of clutter in this zone. I change out the seasonal items as it makes sense.

O- open up and clean

Always a good idea.


N- neaten, organize, and solve problem spots.

For organization we have:

1. The pocket organizer.

yay! my husband got a new lunch bag! You can see the old one hanging here.

2. Hooks on boards, now all of them silver.


3. A boot shelf with the magazine holders hacked into flip flop and sandal holders with a new curtain rod mounted above from which to hang things, namely, the rubber boots.


Problem Spots:

This eyesore:

yep, that's the electrical panel for the house. Yes, we need to upgrade.


When I saw a Ribba frame mounted to the wall on a piano hinge in the IKEA showroom, I knew I had my solution.

those are peel and stick magnets on the wall to help keep the frame closed (eta: we had to replace those with 3M command velcro fasteners.)


Many years ago, I had put up a paper towel bar to hold towels for cleaning off the dog's paws. Somehow, it got taken down and lost. I needed to put something back up.


installed during the Spring Cure 2008


installed Fall 2013


The spray bottles are there because we received complaints about the dog barking. We spray him with water and he stops.

V- verify rabbit trails and set up stations.

Not applicable in this situation.

E- examine sight zones

According to Clark, sight zones are those areas which you see first when you enter the area. If the first thing you see, as she says, is a messy bookcase, your impression of the room is that it is messy. If, on the other hand, you see something neat and organized, say, the made-up bed, then your impression is of a clean room--even if when you turn your head you see a cluttered dresser. To you, it will still be a clean room with a messy area.

She identifies four ways in which this all important first impression can be made--two of which concerned this area. They were
  1. the sight zone when you entered through the back door and
  2. the inevitable invisibles--the nicks and cracks and nastiness you just stop seeing after a while but which leave you with a sense of disorder and disrepair.

This was the sight zone as you entered the back door and looked down the stairs, straight ahead:


This is what it looked like today:


Admittedly, not a whole lot better. For this to dramatically improve, I need to paint the stairs (could happen), the basement floor (not going to happen), and do something about the stuff on the basement floor (will happen from time to time).

This next little area of the entry way is a great example of the nasty nicks, cracks and general groadiness that becomes more and more invisible as it builds up over time.


But we dealt with the nicks and cracks handily--and by "we" I mean my husband. He did a fabulous job in here.


R- record future improvements needed

I'd like to figure out a way to remove the old lock properly--both from the door and the molding. That will have to wait for the Spring, though!


We put all the weather stripping on the door we could. (The door is so uneven in its frame we had to use two different thicknesses.)

what is sunlight pouring through through the crack in August is frigid air in November


T- take steps now for ongoing maintenance

That rag on the towel rack isn't just for the dog's paws, of course, but for messes tracked in by other wet and dirty paws, ahem. I used to keep a rag in the kitchen drawer--this is so much easier.

A new rug and the area is done. It is a thousand times more pleasant than it's ever been. Finally, I feel like it is part of the house, instead of just an area to get through quickly on my way to somewhere else.

that photograph in the frame is one I took of some flowers we had on the kitchen table
Is there an area in your house that might benefit from a little cosmetic face-lift? Let's hope it won't take you six months!

Friday, October 11, 2013

Day 11: Accept Help

It may seem as though we took a small detour from dealing with perfectionism, but we didn't. Not really. Sometimes, problems with finishing things have nothing to do with perfectionism, and sometimes they do.

But there's no doubt in my mind that finding it difficult to ask for help is definitely a symptom of perfectionism. I have a terrible time with this one.

In fact, I almost couldn't even write this post because with every single example I could think of lately where I asked family members for help, all I could think about was how poorly they did the jobs I asked them to do.

And I don't want to talk about that on a public blog.

But, working on the back entry way, today, I realised I did have a recent example of asking for help--and it's working out wonderfully.

On September 23rd, I wrote a post as part of the HTCI (The House that Cleans Itself series--which I haven't forgotten about!) about our back entry way. In it, I mentioned we were going to look after all the scratches and nicks and cracks in the walls and ceilings in order to spiff it up.

Then, I posted this:


My husband is meticulous. He's careful. When he wants too, he can hyper-focus on detail. I am so grateful he took over the project. It was a lot of work--and it needed his patience.

Let's get re-acquainted with the back entry way shall we?

Here is what it looks like standing outside on the stoop. To the right are the stairs to the kitchen.


Straight ahead? The stairs to the basement.


The bottom edge of those walls were in rough shape.

Someone drew this flower on the wall ages ago to indicate where the pull cord was for the light in the laundry room. I coloured it in last Spring.


So, too, was the outer corner where the stairs to the kitchen meet the stairs to the basement.


The wall beside the door needed a lot of patching. Look over the door: that was a particularly nasty spot.


The door itself would swing open of its own accord and give the wall a bang.


I found something for that right away. Fortunately, it was peel and stick. I'm not sure there was enough wall left for screws to work!

I also found a plastic "short L" shaped piece of molding--it was made just for edges like these. It came with its own adhesive strip, fortunately, because I wasn't able to track down any liquid nails.

Here's the outside corner with its new edge:

It looks wonky here--and though it might be wonky, I don't think it is as wonky as this!


And the bottom of the wall:


You can also see the disk I stuck on the wall to protect it from the door knob.

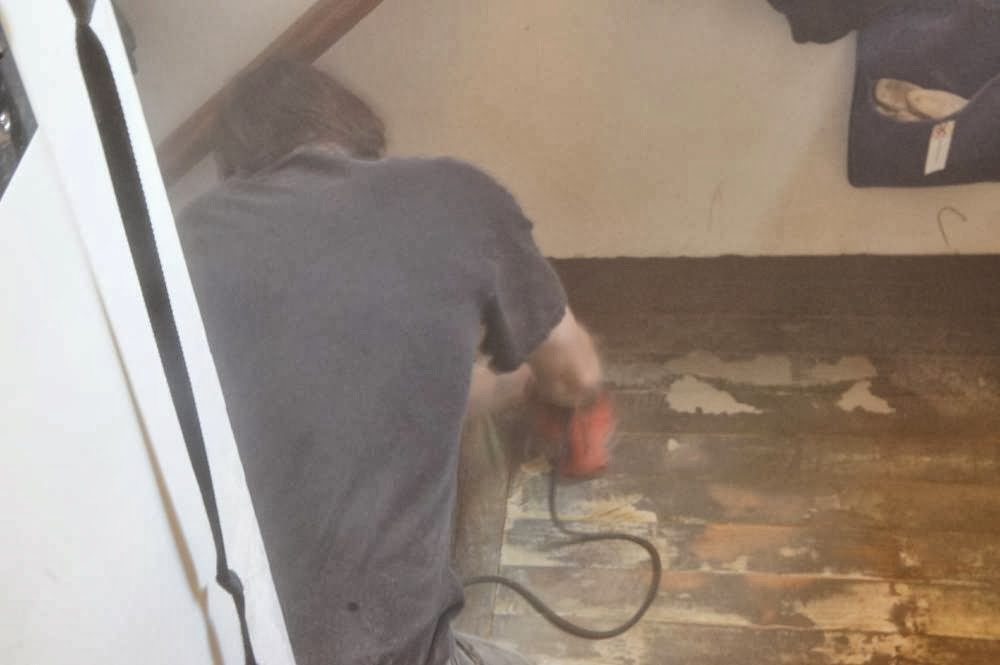
Yesterday, 16 days after he started patching and sanding, he told me it would be OK to start painting, Only -- would I sand "that little bit in the corner."

I sanded, but obviously I had no idea what he meant because when he got home--after I had washed the place down and cut in-- he told me the area he'd mentioned hadn't been sanded!

So, last night, he sanded, again, (though this time by hand) and left me to do the rest.


But who cares?

All it needed was a quick once over with the vacuum, a quick swipe with the cloth and I was ready to resume painting.

It's kind of unfortunate that the best example I have of accepting help has to do with a large project. Staying organized is all about doing the little things--and asking for help with those things (and accepting it cheerfully and NOT with a critical, judgemental spirit) are what will help you stay organized. All I can say is: I promise to keep working on it.
 
 
ETA: You can catch all the posts in the series here.    

Related Posts Plugin for WordPress, Blogger...