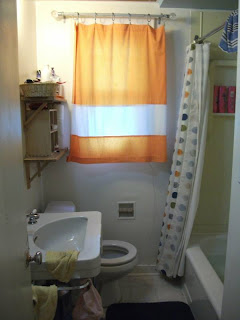
In spite of the fact that we ripped out the old, yellowed plastic tub and tile surround on November 20th and finished grouting our new tile sometime during the last week of January, 12 weeks later, and it is now the beginning of March, we're still not finished in the bathroom. Such is the DIY life with us.
I still need to paint the walls and sew a proper curtain and possibly a shower curtain. (I've had the IKEA Toftbo since 2007!)
We also need to install a new, more powerful fan to help us with the moisture issues in here and I'm still scrubbing tape residue from the sides of the tub here we taped to protect it.
But enough. It's white! bright! and shiny! and ever so much better.
Here's a tour of our imperfect-but-that's life bathroom.
From the door:
Before (July 2010)

Today:

Fortunately, this shelving is all gone:

And now:

Thanks for your suggestions: I have been looking for some bathroom art to go in the spot beteen the cabinet and the toilet.
My daughter has been setting her alarm to get up 15 minutes earlier in the morning so she can shower. She never used to shower. She told me the other day that the old shower "creeped her out."
I know exactly what she meant.
I am upset that I don't have pictures of the old creepy tub and shower surround to show you. I did take a set of pictures expressly for this post: I knew I would only have the courage to show you the true horror if I could also wipe your brains clear of the image with the "After." I've been spared that humiliation, however, as the pictures were lost in the Computer Crash. I suppose I should be grateful.
Instead, though. I can give you a small glimpse from pictures I've posted before. Here is the back wall by the window:
Before:

And now:

The plumbing wall, then:

Now:

Remember the hole in the wall?

That's all fixed with new baseboard and quarter round and everything! (well, except paint. That's just primer.)

And the best part: the back wall.
(This really was the worst. There is no before.)

We love our niches!
Lessons learned:
1) Research, research, research. We walked into this quite thinking we would figure it out as we went. We did--but it took a whole lot longer than it would have, otherwise. We didn't know what we'd find when we took the plastic off: we didn't know we'd have to re-build the walls. We should have researched our options "just in case."
2) Don't make decisions at Home Depot.
OK. We didn't, quite. But we found out about the Kerdie and jumped without investigating other options. By the time we finished, we'd found out about something called Weediboard which I think we would have preferred.
3) Take all the walls down to the studs. We really should have done this. We thought we'd keep materials out of the landfill. We didn't think we kanted the work. Using the Kerdie/Schluter seemed like a great way to keep our existing walls and sort of patch the old and new together. And so it was. But in the end, it was also more work than starting again from scratch--and if we had torn down all the walls, we could have insulated the exterior wall better. And more and better insulation is never a bad thing!
And so, there we have it.
It may leave a bit to be desired from a decorating stand point, but taking a shower in here (and, so I'm told, a bath) is wonderful.

4 comments :
Wow!
It looks like you did a great job! That new shower looks so much more inviting! I kind of want you to paint the walls a nice dark blue-gray to show off that lovely new tile job and the nice white cabinet... I know, more projects. But I think you could totally get away with it between the white tile/cabinets etc. and all the light from that nice window.
dark blue grey is kind of what I've been thinking too--ell, no actually, I as thinking navy--but I think I like your idea better!
Thanks.
Oh it's so fresh! I love it. That was a twelve weeks well spent.
I like the shower curtain, it looks happy and brings colour to the place.
Post a Comment