Friday, May 3, 2013

Project 3: Sending a Fax

It was worth some money to us.

Where do I begin?

With the new printer?

The old wifi box?

I had to haul it out of the "take it to the eco-centre" box to take a picture for you!


Let's just say I had to purchase on-line support to reconfigure our encrypted wifi after trying to set the wifi for our new printer de-encrypted it. There. That didn't take too long to explain.

Along with my on-line support came the offer of a $15.00 rebate for a new wifi box if I could not fix my problem after purchasing their technical support.

In a sense, they fixed our problem, I had encrypted wifi again. But, in another, the problem wasn't fixed as it wasn't stable. (It still isn't completely 100% trouble free, but I think it's the modem that's at fault, now.) On a subsequent call, the technician suggested I was entitled to my rebate and sent me an e-mail saying so.

So, we bought a new wifi box. A sleek pretty little black thing I can hide out of sight on my pull-out shelf.

Wifi on the left, modem on the right.

Very nice.

However, to claim my rebate, I had to fax a copy of my receipt along with a copy of that e-mail which said I was entitled to it.

Our fax machine is in the basement.

Aside-- (Ok, so technically, I can use the new printer as a fax machine--but I would have to figure out the phone cord thing all over again. And then learn how to send a fax. Believe me, using the old fax machine would be quicker! I did make the copies on my new printer, though.)

Yes, the basement.


The date on this picture is the same as that on my receipt. That was the day we moved the chest of drawers which had been here (with the fax machine on top) over to the other side of the laundry room so we could move in the paint cabinet (which had to moved to make room for yet another cabinet. The whole thing was so ridiculous, I never did blog about it.) But, as you can see, sending a fax would have been a tad complicated.


Fortunately, when I finally decided to send the fax, things had settled down somewhat.


Less than ten minutes later, we were ready to plug in the power and the phone cords


We don't have cable, so everything goes through our phone lines.

and send the fax.

We re-use paper my husband brings home from work. Documents are sent face down with this machine. And yes, it's old. I bought it probably in 1993 or thereabouts. That's NOT 20 years ago. It's not.

Bonus: The place where we keep the machine is now all nice and tidy.


It was immensely satisfying and the money won't hurt either!

Update.
The basement wall where the shelves used to be looks like this now:

 
and everything is just out of the above frame to the left!


If you're following along with my craziness during this month's Anti-procrastination Project, let me know! I love your comments.


Thursday, May 2, 2013

Project 2: My Daughter's Artwork


Project Anti-Procratination continues. (Ihope so! This is only the second day. I haven't quit, yet!)

This is another one of those spin-offs from the basement picture framing project. I found two pieces of my daughter's artwork already framed. The third piece was this. I think she did it two years ago, in grade five, maybe?


I really didn't think too hard about it.

Black is classic. Black works.


The hard part was figuring out where to hang them.


I used to have a great family wall in the stairwell: but one by one the pieces fell down. The nails and the nail holes are still there however--and a couple of frames have survived.


So, I figured, why not?

The whole point of taking this project is to get stuff done. If it isn't the perfect place, oh well. I will find that perfect place eventually, if there is such a thing. I actually considered postponing hanging these until I had weighed and considered all the possible options (not that there are that many, really!) But that would defeat the purpose of this month long Anti-Procrastination project.

I dusted the walls first, though. So glad I did. I don't know how walls get so dusty, but they do.


I washed them, too.

I've always wanted to put a picture here between the two bookcases. I figure it has to be more attractive than the boxes I had here all winter!


my aplogies to all green thumbs out there. This is a corn plant and I let it get dry a bit too often this winter.

So, here they are.


That stairwell looks a little bare but I'm not in any rush to fill it up.

(And h*ll yes, I want to repaint that stairwell--that yellow-green looks hideous to me now--why do you think I've neglected it?)

Linking to Jules at Pancakes and French Fries just 'cause it's Thursday and time for our William Morris get-together.

'Til tomorrow.

Wednesday, May 1, 2013

Project 1: The Horses

Back in the summer of 2010, our family took a vacation to the southern end of our province. It was a marvelous trip.

Throughout, my daughter kept asking me whether she should buy this or that for a souvenir. In a gift shop, somewhere, she came across a napkin that had been beautifully printed with four separate images of horses. She wanted it--and I told her we could frame each of the pictures to preserve it. Horses are a ubiquitous part of the southern end of our province and my daughter was ten--that perfectly horse-mad age for girls.

My daughter asked how much it was and as a lone napkin she got it for free.

I am not at all proud to tell you how long it has taken me to put together this project for her. I found the frames and the napkin in my dresser drawer last month and I took 20 minutes, just 20 minutes to put them together.

I left them on her bed--and when she saw them she asked me, "What are these?"

When I told her, she was thrilled--and then she asked me to hang them up outside her room for her. (The eaves slope in our upstairs bedrooms. Neither of us has much wall space.)

There were nails in the wall there already, but this isn't quite what I'd had in mind.

 
I am not about to let this particular part of the project languish for another three years, so I got out my tape measure, pencil and ruler, hammer and nails.


There. All better!

I thought it was a great way to begin this month's Project Anti-Procrastination!

Since this madness is all Tsh's fault, I am linking this first project to that last project, in her series, the "put off project."


Project Simplify on Simple Mom
 
That was sriously energising! I challenge anyone who has a project languishing in the dark corners of the house somewhere, to just go and get her done.


Tuesday, April 30, 2013

May Goals: Anti-Procrastination Project Month

The goal: It is June 1st and I am a master of my To Do list, I am calm and content and ready to look forward to the summer with a clean slate.

Several things came together.

Firstly, I found a list of projects I put together in September of 2012. Although decluttering the basement meant I was able to put a check mark beside several of them, many, many more remain.

Secondly, as the Fundamentals class draws to a close, I've been discussing how to capture my on-going projects (make a list) and then how to remember to do them (review that list). I can make lists 'til the cows come home: where the system fails is in my review of the things which need doing. Quite simply, I don't. So, I hauled them all out to see what was what.


I thought I might focus on four projects this month--one a week. Then, I realised that would not be enough. I really need to get out from under all these nagging to-dos.

Thirdly, Tsh of Simple Mom devoted the entire month of April to various projects. Unfortunately, I only found out about it last week or I would have participated more fully.

The last project for the month, is, as she put it, that put-off project. You know, the one you are always putting off. I started looking around for such projects--and I did not have to look far.

My dining room table is sporting at least three projects all by itself.


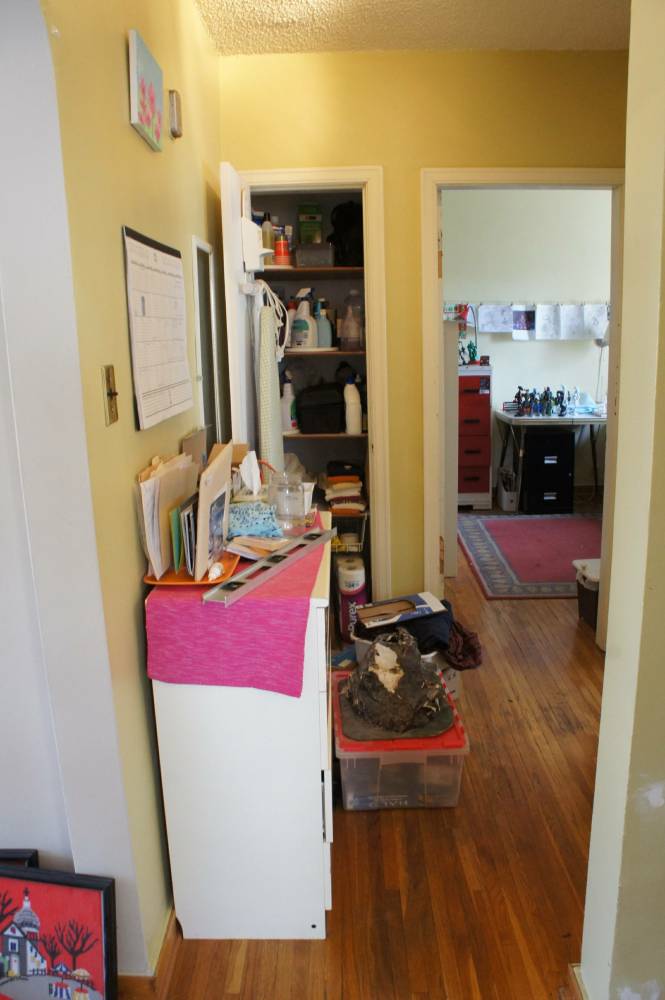
The dresser in the back hallway? Well, that's the contents of the top drawer all over it. (There's more on the kitchen table.)


I came up with 35 projects that I have been procrastinating--some for a few days, some a few years. One is major (paint the backyard fence) but more than 13 of them can be done in 1/2 hour or less.

Of course, you realise that all of this is in addition to building and insulating a wall in the basement with my husband this week and painting all the shelves.

This:


is now this:
 
sometimes I think it's a miracle this house is still standing


As well, there are other garden related tasks which must be done this month too, if we're to take full advantage of our short growing season.

Oh, and I am already behind in my Clean and Simple Class at Big Picture. I need to catch up and stay caught up with that, too.

So, my plan is to blog every day in May about at least one project done.

Done! Crossed off. Check marked. Completed.

I have forty to choose from. Let's see if I can do it.

Monday, April 29, 2013

New Hallway Shelf

I did this project in a funk.

It started out well. I had decided during the Simplify 101 workshop Organizing Fundamentals that I needed to have my hallway cabinet back. But I didn't want to move in the old cabinet.

Picture from the Spring Cure, 2011
 
 
Moving it out gained a lot of space in my hallway, but I also lost a place
 
  • to decorate for the season
  • to put library books we've finished and dvds to return
  • for market bags
  • to store our recharging station
  
The market bags could be stored in the closet (as they are not all that attractive, even in a basket) and the recharging station has been relocated to a shelf in the living room.
 
I figured a shelf with a basket underneath for the library books would work.
 
I couldn't find a basket that had the right dimensions--but I did find a tub at Micheal's. I loved how the silver would coordinate with the mirror.

I put it in the hallway to get people used to the idea. (It is currently holding needlepoint pictures to go to my Mom.)


I went rooting around in my husband's newly organized workshop and found an 8" shelf and brackets that would do.
I was feeling pretty good about it. I started painting them yellow --the old cabinet had been yellow--and I want to include yellow in every room in my house. But, I feared they would look just too "country." So, I started perusing my pinterest boards.
 
I love entry way tables and vignettes. I really do. When done well, they seem like the perfect marriage of function and style. I have an entire pinterest board devoted to them.
 
Somehow, this picture became my inspiration:


I loved the blue and green! I thought the table top was navy. I realise now it is most likely black. But no matter. I had navy spray paint on hand. I sprayed the shelf and the brackets last week. I thought I would duplicate the edging --only in silver-- on the edges of my brackets.
 
My husband and I installed the shelf this weekend. (I started it and ran into trouble--he fixed it for me!)

Please excuse that hole in the wall. It used to be an outlet for a central vacuum that was removed before my husband bought the house. We haven't found a cover that will fit for it yet. Yes, I know I've been here 16 years. These things take time, apparently.
 
 
I toured the web this weekend and I realised that the "in" thing is navy and brass. (see inspiration pic, above, too.)


This, from Jenny at LGN, makes me wonder if I should have kept the boards I painted in their original orangy pine, but spray painted the mirror brass instead. Of course, I'd have to paint the hall this darker edgy grey, but I have been dying to paint that hallway a different colour for months, now.
 
Navy and silver is old, fusty, out of date. And it got me down.
 
I know that it shouldn't have. I know that comparing myself to others just leads to discontent and depression. I also saw a fabulous house tour this weekend. The house is tasteful, up to date (without being up to the minute) and there is a cohesive colour scheme and feel to all of the spaces throughout.
It was gorgeous, beautifully articulated vision of what "home" meant to this person.
 
And I sighed and wished I had the same.
 
So, I put up a shelf in my hallway.

 
I do like it, though.

Friday, April 26, 2013

The Pile in the Hall

When I cleaned my son's room last weekend, I very carefully did not show you the pile I'd made.


Right here, right outside his doorway.


It sat there Monday.

It sat there Tuesday.

It sat there Wednesday.

Finally, on Thursday, (yesterday) I got tired of walking around it. I wanted to close the closet door, too.

That's me standing in the doorway to the bathroom. Hi!

So, I got rid of it.

The disgustingly dusty Lincoln Logs with soldiers in the dustpan got upended into the kitchen sink and everything was washed. There's no "before." It was that bad.


After playing with them for a few minutes after school, my daughter helped me bag them up for donation.


I had to wait until my son got home for permission to put things like the boxes his Bionicles came in into the garbage and the recycling bag. He was OK with it. After that, I made short work of what was left: the volcano was dusted, wrapped and placed in the games room, the clothing was put into the laundry hamper, and the storage container repurposed.

Ta Da!

Sorry. Not exactly stellar photos. Hard to do in the evening.

Much better.

my poor floors!


This was hard for me. I'm not sure what's going on in my head, either.

It doesn't sound reasonable once I say it out loud, but all day I was in that anxious state I get when I think "I got nothing done, today."

I'm supposed to be working in the basement, on the shelves. That's the focus. And while I did work there and do a few things, all day long I really felt like I got nothing done. This project wasn't on a to do list. It wasn't an anticipated part of the project "cleaning my son's room." It wasn't a decluttering project, or an organizing project. It was just stuff in the hallway. It was just left overs. And because of that, I resist doing these sorts of things. (There's a similiar situation currently in my dining room.)

That's why I took pictures and wrote this blog post--so I have proof I really did do something today and it counts.


(There's a reason the word "therapy" is a part of my blog's name!)

Anyway, it was a pile--and I cleared it. That qualifies me for a link up to Project Simplify. Yay!

Project Simplify on Simple Mom

Thursday, April 25, 2013

The Picture Frames


I am in the last week for sorting through the stuff in the basement before we tear down the wall o' shelves to install insulation and beadboard behind them.

This is how the wall looked when I began the basement project in early March.


And that means I can't put off sorting through the picture frames any longer.

I counted what was here when I started. I had thirty.

It took me all day.


Fall Out:

Number of frames to repair: 2

Number of frames painted: 2,  possibly 2 more.

I have a little painting station set up in the launry room right now. It was a joy to just step over and use it. Yes, joy.

Number of prints reframed or fixed: 3

1) 1 set of 3 pictures. Hung in the downstairs bath.


2) A piece of artwork my daughter did. (The artwork is falling off the backing)

3) The upstairs bathroom artwork

In March of 2011, when I first posted pictures of this bathroom makeover, someone suggested I reframe the artwork I had hanging there to create a bigger mat for it. I bought the frame shortly after: but the whitewashing of the frame and transferring the artwork didn't happen until now, two years later.

Number of pieces of art framed: 3

1) a watercolour

The frame, matts and the art piece itself all came from different sources, and I had all of it on hand.


2) A photo of light on the water from the setting sun which I took when I lived near water.


3) A print of a place I used to live in Ontario which I found in a Value Village, here!

That church was at the end of the street I lived on. That building to the right was, ahem, my local watering hole.

Number of photos stuck to glass which need to be unstuck: 2

Apparently, I need to soak them in a tub of water with something called photoflo. (It's a mild chemical used in the last step of developing photos. I have to track some down.)

Number of pieces of artwrok I am passing on to my Mom: 2

These are needlepoint, stitched by my Mother's sister. When she's finished with them, I'll take them back. They are just so, just so, red.


Number of walls of art to be created: 2

Number of walls of artwork I can create right now (as soon as I get the command hooks): 1

Number of frames to donate: 10!


Thanks for checking in! Linking to Jules and the William Morris Project at Pancakes and French Fries.
Related Posts Plugin for WordPress, Blogger...