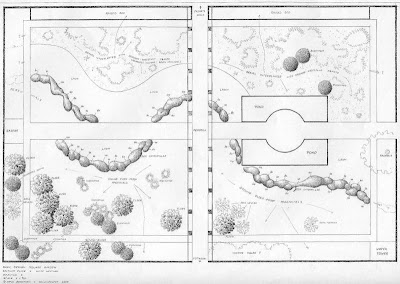
(Square Garden at
Waltham Place, Berkshire)
One of the most basic steps after determining what "rooms" your landscape will include (and what their purpose should be) is to decide what shape they ought to take. You can either begin here...or end up here, depending on which way you prefer to work.
Whichever approach you take, you will want to have done a scale drawing of the area you're working with. Here's mine:
 (That dot in the lower left corner is the flag pole.)
If you want to end up with your borders, you follow these steps:
1. Find your "main view"
2. Determine your focal point.
3. Frame your focal point.
4. Determine the secondary view.
5. Repeat steps 2 and 3 above.
6. Now, arrange the focal points. Imagine each little "nest" of frames and focal points is a piece of furniture and move them around on your scale plan of the area you're working with. Your focal points will lead the eye "around the room" so make sure it doesn't lead it to anything unpleasant (like the telephone pole, or whatever.)
7. Draw a border. You can do this two ways: a) draw a loose shape, equi-distant from each focal point, or b) simply trace the outline of the frames and adjust accordingly.
When I was playing around with this approach and sketches, I came up with this:

It's a nice plan, focusing on the entryway and making the most of that wretched sidewalk. In fact, that my efforts were on the right track was confirmed by a "front entry" planting plan I came across in a book. I re-created it and looked up each plant listed in order to get a feel for the layout. I made my own colour coded sketch.

Isn't it lovely?
(Another way to use the idea of a bouquet: just turn it on its side and find plants to "fill it in." Sort of a gardening 'paint by numbers' approach.)
But note this: once the blooms fade, there is nothing, nothing interesting here at all. Even if I switched out the plantings with conifers, dogwoods and grasses, the dominant perspective changes from looking in from the street to out through the windows, and so the plan (and the approach) does not work for me.
No, because "winter interest" is almost more important in this place where we have more days of winter than any other season*, I have to start with what will be left when summer is over, and that means the framework, the out-line, viz. the shape of the garden.
So, there are triangles, as we've seen, circles, squares, and rectangles, and of course, combinations. The recommendation is to go with the shape which is the "most natural" for the space.
I toyed with circles for a long time. I love the look of a circle within a square, especially.

And then, there's the circle "wheel" which I also love:
 (Not one plant is over 8" high in this planting bed.)
But here's how circles/ovals would look in my garden:

Somehow, they're all out of proportion to the space and, unfortunately, don't really "fit."
Then, there are rectangles. I'm currently working on an idea with three long rectangles crossing the house and a center ellipse.

A "transparent" fence on the bottom, (12-13 feet deep) provides a low boundary and winter interest (it's deep enough for conifers to "back" a few dogwoods). The ellipse in the center gives us a limited amount of grass to mow and provides a focal point at each end. (Making the flag pole one of the "frames" for the focal point instead of the focal point itself was last night's inspiration)
The planting bed in the third rectangle, closest to the house, gives me all the "playing" room I want (and maybe more than I want.) The only disadvantage to this extremely linear plan is our wacky, nasty, sidewalk to the house. It was very poorly done and I think we both want to replace it. (Some day.)
So, this is another way to approach designing the landscape. It gives you a few bones on which to scaffold the rest of your plantings and plans.
*according to one source, on average, we have 145 "continuous frost free days" and 225 days "outside the frost free period" i.e., winter.

 I'm not sure how the minor vertical axes made it into this diagram, but I'm not sure I care.


